User Guide
Working with Custom Reports
Overview
Custom Reports helps you understand the current state of your organization's data security, privacy, and compliance.
How to Access Custom Reports
To access Custom Reports:
-
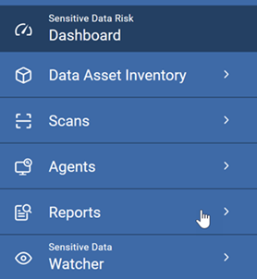
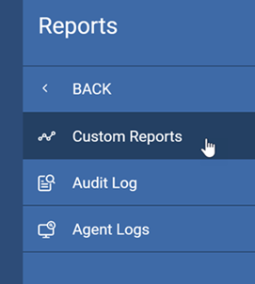
From the left menu, click Reports.
-
The default selection is Custom Reports.
-
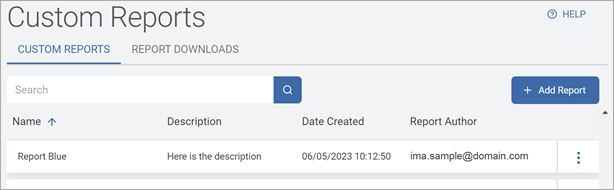
The Custom Reports tab shows Reports displayed by:
-
Name- Name of the report.
-
Description - Report description. This is taken from the Description field, to the right of the Name field in the report creation wizard. To update this field, click Manage from the More Options menu for a report.
-
Date Created - Date the report was created
- Report Author - User account that created the report
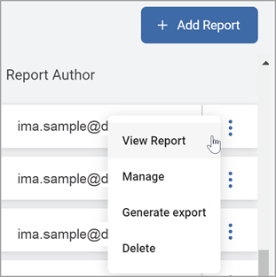
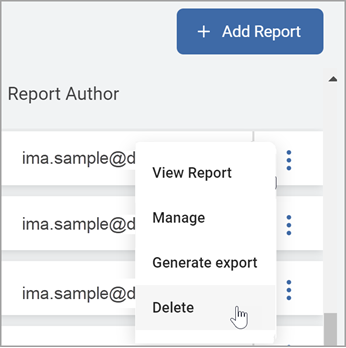
- More Options
- View report - Opens the report in a new tab
- Manage - Opens the report Basic Information wizard so you can change/update report details
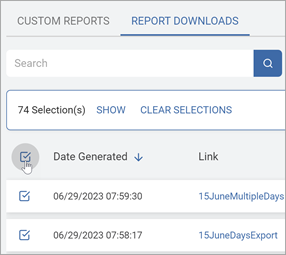
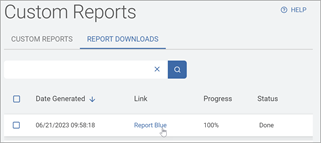
- Generate report - Initiates the report export process. This can take several minutes. When the report is complete:
- The report appears under the REPORT DOWNLOADS tab:
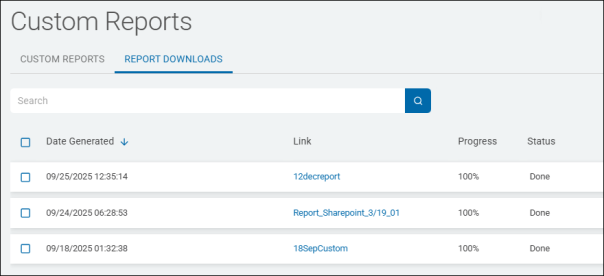
- Click the report link to download the report ZIP file.
- Click the report link to download the report ZIP file.
- An email is sent to the email account of the report author. See the example image below:
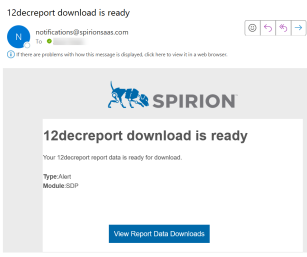
- The report appears under the REPORT DOWNLOADS tab:
- Delete - Deletes the report.
- Manage Permissions - Set the access to the report by:
- User (Inherited, None, Read, Manage)
- User Role (None, Read, Manage)
-
How to View a Report
Use the following steps to view a report:
-
Locate the Report you want to view.
-
On the far right of the report line, hover over the more options menu.
-
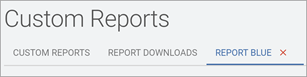
Click View Report.
-
The Report is displayed in a new tab for viewing:
-
Click the red X to close the Report.
Note: Some reports take a significant amount of time to generate, and if you navigate away from the Reports screen, it stops the process.
For large reports, best practice is to export the report and view it when you are notified via email that the download is complete.
See How to Export a Report for more information.
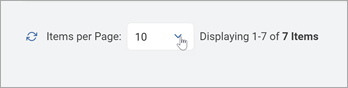
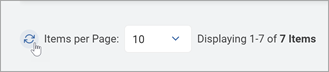
How to Set Number of Items Per Page
Use Items per Page to set the number of Reports displayed per page:
-
Select an option from the Items per Page down-down list:
-
10
-
100
-
500
-
-
Click the refresh icon to refresh the page contents.
-
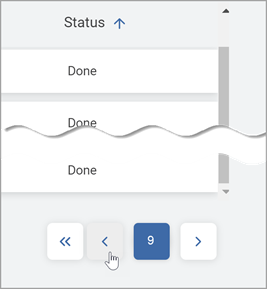
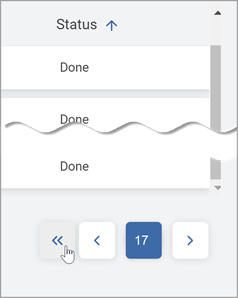
Use the left and right arrows to page through the reports, if applicable.
-
Use the left double arrow to return to the start of the list.
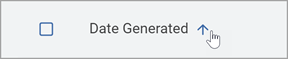
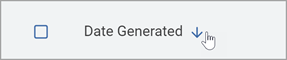
How to Sort Reports Displayed
You can sort each column by ascending or descending:
Hover over the columns name.
-
Click the up arrow for Ascending.
-
Click the down arrow for Descending.
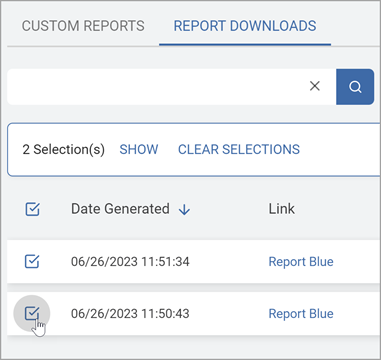
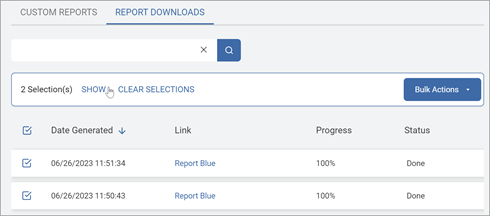
How to Manage Report Downloads
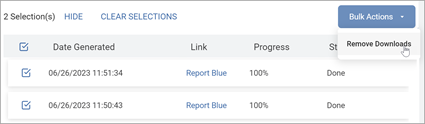
You can use the Bulk Actions feature to manage your Report downloads with bulk delete:
-
On the Reports Download tab, select one or more report downloads to delete.
-
The Bulk Actions section is displayed. Do any of the following:
-
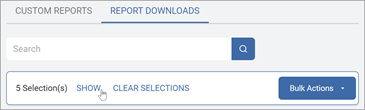
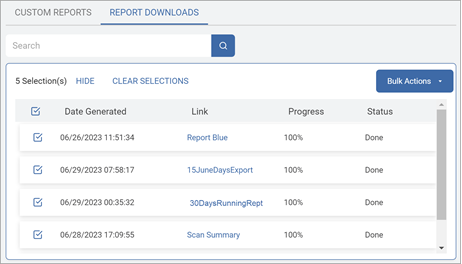
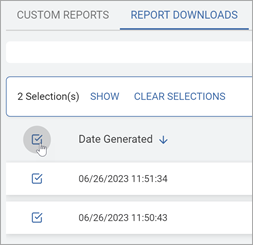
Click SHOW to display the list of selected reports.
-
Click HIDE to collapse the list of selected reports.
-
Click CLEAR SELECTIONS to remove all selections.
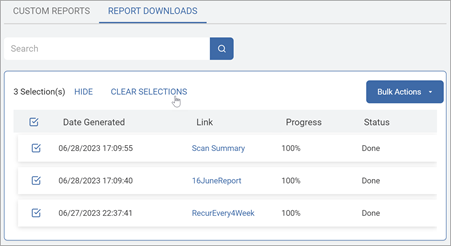
Note: The CLEAR SELECTIONS action is immediate and cannot be undone.
-
To select all Report downloads, click the Select All box to the left of the Date Generated columns.
-
To deselect all Report downloads, click the Select All box again.
-
Click the blue Bulk Actions button, then Remove Downloads.
-
In the "Remove Report Downloads" pop-up window, click the Confirm button to delete or Cancel button to discard.

-
You will receive notification of the deletion in the lower left of your screen.

Note: Deleting a report download does not delete the report. To delete a report, see How to Delete a Report.
How to Create a Custom Report
To create a custom report use the following steps:
-
From the left side navigation menu, click Reports > Custom Reports.
-
The "Custom Reports" page opens.
-
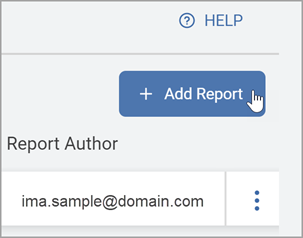
Click the blue + Add Report button in the top right corner.
-
The Create Report wizard is shown.
-
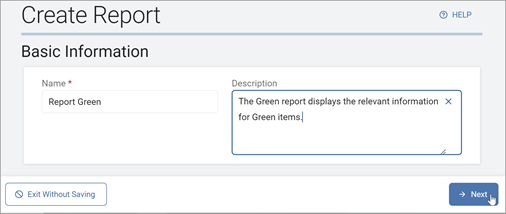
On the Basic Information screen, complete the following fields:
-
Name: Type the name of the report (required).
-
Description: Type a short description of the report.
-
-
Click the Next button to proceed or the Exit Without Saving button to discard your changes.
-
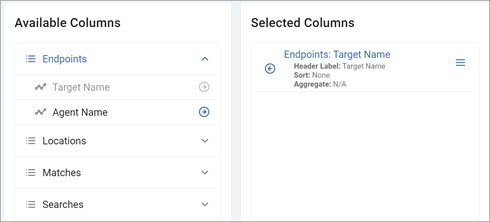
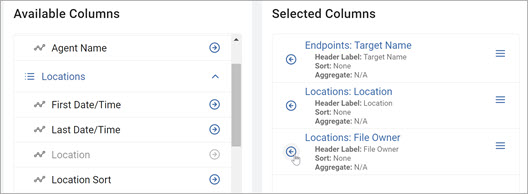
On the "Columns Setup" screen, in the Available Columns section, choose from the following to include in your report:
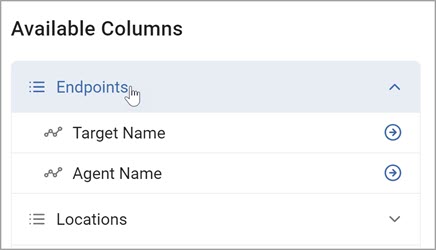
Available Columns
Endpoints
Endpoints can include:
-
Target Name: Any data location(s) within an Asset (physical or cloud locations) that Spirion Sensitive Data Platform can scan.
-
Agent Name: Any Target with a Spirion Sensitive Data Platform Agent installed on it.
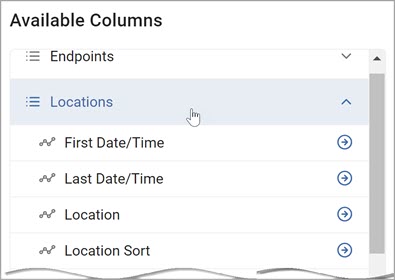
Locations
Locations can include any of the following to refine your report one or more specific locations of your data.
This data can further be sorted in certain categories, for example, Location Sort:
-
First Date/Time: First Date/time the Location was found in Date/Time format.
-
Last Date/Time: Date/time a file was last accessed in Date/Time format.
-
Location: Full String that defines the data object
-
Example: File with folder path. The file path format C:\Desktop\NewFolder\Data.
-
-
Location Sort: Use this to sort by multiple locations.
-
File Type: The type of file being accessed
-
Example: XLS, Docx, PDF.
-
-
Internal Location Type: The Repository the target of a scan resides in
-
Example: Cloud, Database, Email, local, etc.
-
-
File Owner: Name of the owner of the file.
-
File Size: The actual size of the file (in bytes).
-
Weight: Using this depends on your organization's Weight value settings.
-
Data Type Value is the number you assign to the Data Type to give it weight.
-
This enables you to add emphasis to certain Data Types to gain insight into your data.
-
See Working with Global Data Types for more information.
-
-
Date/Time Created: This is the process initial creation date.
-
Date/Time Modified: This is the last time the process was modified.
-
Date/Time Accessed: This is the last time someone accessed the process.
-
Playbooks: This value is based on your organization's Playbooks structure.
-
See Working with Scan Playbooks for more information.
-
-
Playbook states: This value is based on your organization's Playbooks structure.
-
Classifications: Use this to sort by classifications.
-
These are set by your organization.
-
See Working with Global Classifications for more information.
-
-
Assignees: Name of the individual(s) assigned to a location/match via a playbook action.
-
Match Count: Total count of Matches in a Specified location.
Matches
Matches can include any of the following to refine your report by Match results and activities:
-
First Date/Time: First Date/Time the Match was found in Date/Time format.
-
Database Column Names: Name of the Column containing a match in a database target.
-
Primary Key Data: Primary Key Value for tables with matches in a database target.
-
Action Start Date/Time: Date/Time the action started.
-
Match Count: Total count of sensitive data matches in a specified location.
-
Action: Final Action taken on a match or location.
-
Example: Quarantine, Shred, Redact, Ignore, etc.
-
-
Resolution: States whether a match/location was "Protected" or "Unprotected"
-
Data Type: Data Type Found in a location by a sensitive data scan.
-
Data Type Name: Label of Data Type.
-
13.6 Agents only: If Search API matches exist when the report is run, Search API entries are included in the report results.
-
-
Is Custom Data Type: Indicate if a custom data type.

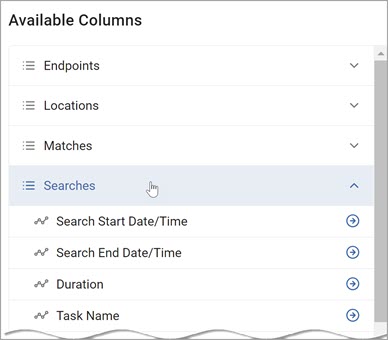
Searches
Searches can include any of the following Search criteria:
-
Search Start Date/Time: Date/Time the Search was started.
-
Search End Date/Time: Date/Time the Search ended.
-
Duration: Total Duration of the scan.
-
Task Name: Name of the Task.
-
Location Count: Total number of Locations.
-
Scan Name: The name of the scan.
-
Scan Type: Discovery Scan or Sensitive Data Scan.
-
Origin: Origin of the scan.
Use the following procedure to perform custom searches:
-
Use the right arrows to move one or more data types to the Selected Columns section.
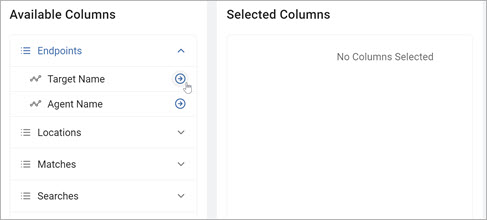
-
Use the left arrows to remove data types.
You can change a Column setting or the order of Columns.
To edit Column settings:
-
In the Select Columns section, hover over the slide drawer navigation icon for the Column you want to edit.
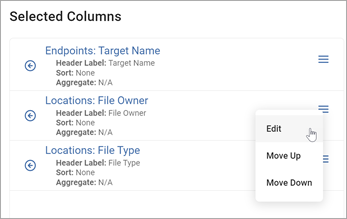
-
Click Edit from the drop-down list.
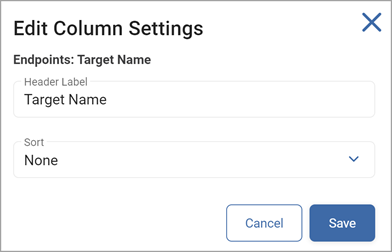
-
In the Edit Columns Settings pop-up window, make any needed changes:
-
Header Label: Type a new label.
-
Sort: Select an option from the drop-down list:
-
None
-
Ascending
-
Descending
-
-
-
Click Save to save the changes or Cancel to discard.
-
To change the Column Order:
-
Hover over the slide drawer navigation icon for the Column you want to move.
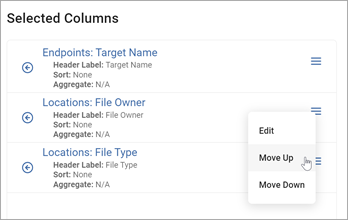
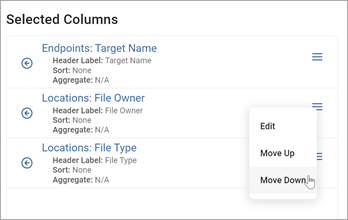
-
Click Move Up or Move Down to re-order the Columns
-
Click Next to proceed, Previous to return to previous page, or Exit Without Saving to discard.
-
-
On the Filters screen, apply filtering to a column by:
-
Column name
-
Desired operation
-
Specific value(s)
-
To include all available data, leave the filter value empty.
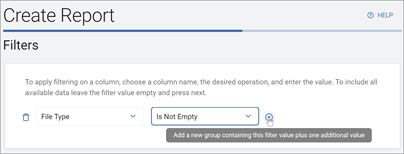
-
-
The Specific Value box data type will vary based on the option chosen in the Column Name drop-down list:
-
File Owner: Type an Owner Name.
-
File Type: Type a File Type.
-
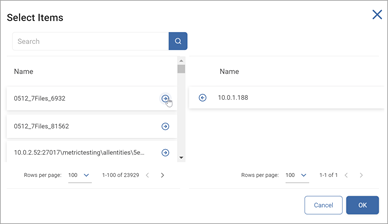
Files Types: Select the more options menu, choose the File Types, and click OK to save or Cancel to discard.
-
Target Name: Type a Target name.
-
Tags: Select the more options menu, choose the Tags and click OK to save or Cancel to discard.
-
Targets: Select the more options menu, choose the Targets and click OK to save or Cancel to discard.
-
-
To add a new value, click a plus icon.
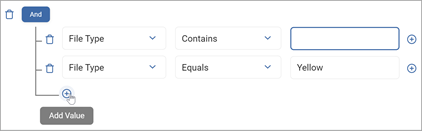
-
To remove a value, click a trash icon.

-
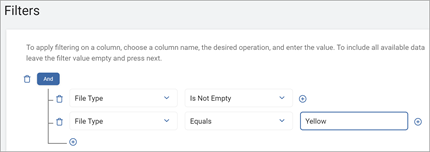
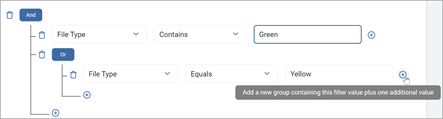
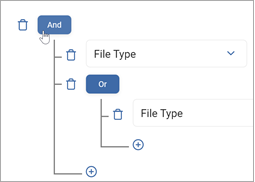
Use the plus icon to the right of a filter statement to add a new group containing the file plus one additional value.
-
Toggle to change between AND and OR values.
Note: The following examples demonstrate how to use both AND and OR functions to create filters:
| Name | Description | Example |
|---|---|---|
| AND | All conditions must be met. |
|
| AND Single Match |
Single condition is met. |
Red AND Green: Must contain red and green items. |
| AND Group Match |
Multiple conditions are met. | (Red AND Green) AND (Red AND White): Must contain both red and green items and red and white items. |
| OR | Any of the conditions can be met. | |
| OR Single Choice |
Single condition is met. | Yellow OR Blue: Can contain yellow or blue items. |
| OR Group Choice |
Multiple conditions are met. |
Yellow OR Blue OR Green: The matches must contain either yellow or blue or green to be returned. |
-
Click Next to proceed, Previous to return to previous page, or Exit Without Saving to discard.
-
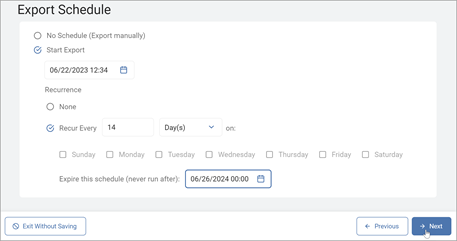
On the Export Schedule screen, choose one of the following:
-
No Schedule: Export manually.
-
Start Export:
-
Date: Select a start date from the date picker.
-
Recurrence: Select one of the following:
-
None: No recurrence.
-
Recur Every:
-
Enter a duration number.
-
Select an option from the calendar term drop-down list.
-
Select the day of the week (if applicable)
-
-
-
Expiration: Select a schedule expiration date from the calendar picker (if applicable).
-
-
-
Click Next to proceed, Previous to return to previous page, or Exit Without Saving to discard.
-
On the Summary screen, review the report details to ensure accuracy by clicking Generate Report Preview.
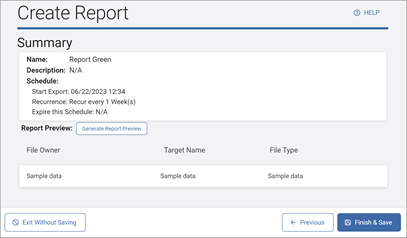
-
Click Confirm to generate the preview or Cancel to discard.
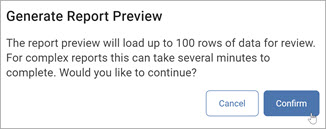
Note: The report preview will load up to 100 rows of data for review. For complex reports this can take several minutes to complete.
-
Click Finish & Save to save the report, Previous to return to the previous page, or Exit Without Saving to discard.
Note: See Creating Your Own Custom Reports for specific examples of reports.
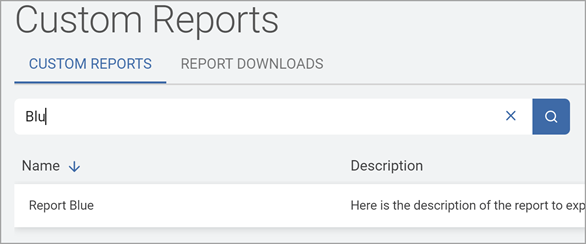
How to Search for a Specific Report
To locate a specific Report:
-
In the Search box, type the name of the Report you want to locate.
-
The results are displayed in the grid below.
-
Click the X to clear the search criteria.
How to Make Changes to a Report
To make changes to an existing Report:
-
In the list, locate the Report you want to edit.
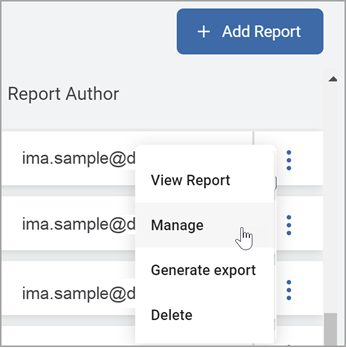
-
On the far right of the report line, hover over the more options menu.
-
Click Manage.
-
The Edit Report screen is displayed.
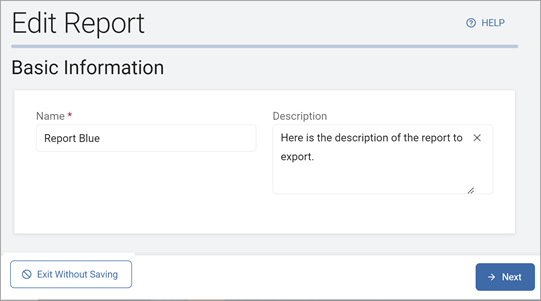
-
Using the Next and Previous buttons to navigate, make required changes on each page.
-
Click Finish & Save to save your changes or Exit Without Saving to discard.
How to Export a Report
To download a Report for export:
-
In the list, locate the Report you want to download.
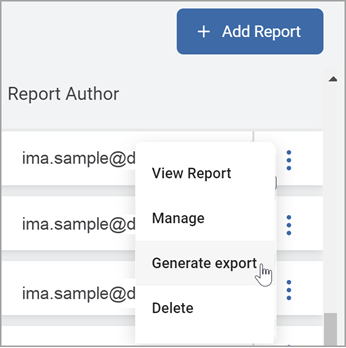
-
On the far right of the report line, hover over the more options menu.
-
Click Generate export
-
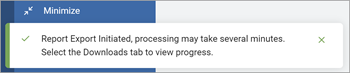
The Report Export is initiated.
Note: Processing may take several minutes. You are notified via email when the report is ready.
-
Select the Downloads tab to view progress.

-
To download a completed report, click the Report name in the Link column.
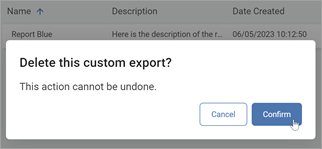
How to Delete a Report
To delete a Report:
-
In the list, locate the Report you want to delete.
-
On the far right of the report line, hover over the more options menu.
-
Click Delete.
-
Click Confirm to complete the deletion or Cancel to discard.